We have a decade-long experience in injection moulding we are happy to share with our clients, both during the mould design stages and when defining the moulding cycle technical aspects.
Usually, the design, the choice of the polymer, and mould production are aspects that only concern the client.
But we can use our considerable expertise and assist our customers during the mould design stages, advising them on the best placement for injection points, the optimal draft angles, the appropriate wall thickness, and how to conceal the parting lines.
Moreover, we can help them determine the parameters of the moulded part and solve any problems that may arise during the injection moulding process. How the melted polymer enters the mould, fills it, and cools down can cause molecular strains, blisters, suction marks, and other common moulding defects such as vacuum voids, burn marks, burrs, etc.
DEEPENING
Mould design
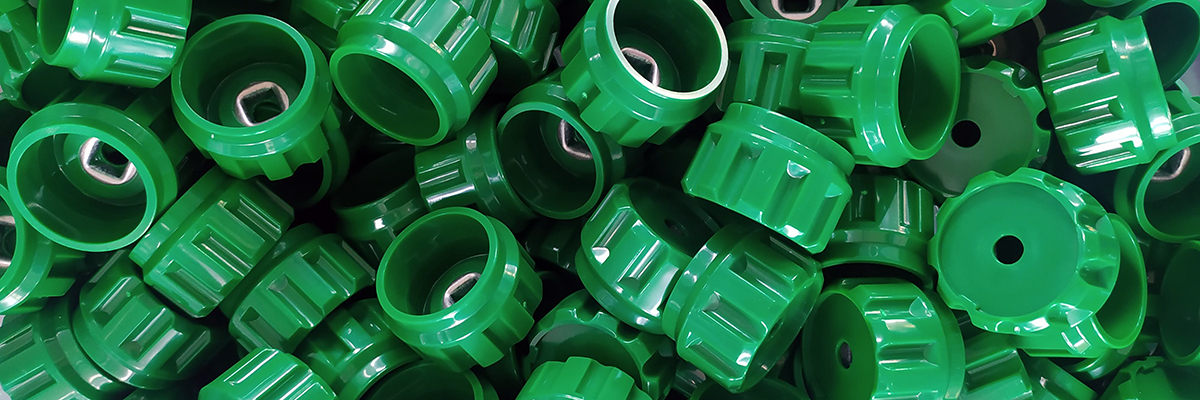
1) Injection points
An incorrect choice – regarding the type, the design, and the position of the injection point(s) – may prejudice the outcome of the production process, creating flaws such as suction marks, aesthetic defects, size defects, or warping and distortion.
Depending on the desired size and shape of the final part, we can decide the best way to place the injection points.
A side injection point is the most common and is suitable for flat parts.
A lower injection point (sub gate) offers greater flexibility and represent an optimal placement.
A hot injection point is ideal for rounded or conical shapes –
where a uniform flow is required. A direct point of injection or sprue is the simplest type to design It causes fewer strains and grants good resistance to the final parts.
The placement of the injection point should minimise obstructions and optimise the filling time.
2) Draft or Taper
Applying an appropriately angled draft to the mould prevents the parts from ejecting incorrectly. The draft – also known as taper – allows the component to free itself from the mould each time it opens. The draft angle depends on several factors, including the surface finish. A smooth and polished surface will require a lower degree.
3) Wall thickness
Before ejection, the parts must suitably cool down to avoid shape modification. During the cooling phase, we minimise variations in pressure, speed, and plastic viscosity to prevent the formation of defects. And during this stage wall thickness is one of the most relevant aspects, which can impact – positively or negatively – the cost, the speed, and the quality of the production. Choosing the appropriate wall thickness has significant effects on production speed and cost. Although there aren’t thickness limits, the minimum thickness is to be preferred.
Thinner walls require less material, reducing costs and cooling time, thus cutting the total production time. On the contrary, thick sections require a longer cooling time. Especially during this phase, if the wall thickness is not uniform, the thinner parts cool down faster than thicker ones.
As the thick sections solidify, they shrink around the already solid ones.. Therefore, the part may bend, break, or warp. It is possible to avoid this problem by incorporating a uniform wall thickness in the mould design. Alternatively, the change in thickness must be as gradual as possible.
4) Parting lines
A “parting line” is the line of separation where the two halves of the mould meet. The line indicates the parting “plane” that passes through the part Although this plane can be a simple and flat surface, often it is a complex shape that traces the perimeter and encompasses the characteristics of the outer silhouette of the part itself. As parting lines are almost impossible to be avoided, it is necessary to design the mould with the knowledge that the molten material will always flow toward the parting line. It is, in fact, the point where it is easier for the air – pushed by the molten plastic – to flow out.
Injection moulding characteristics
1) Molecular strains
The main enemy of any moulded plastic part is the molecular strain. When a plastic resin (which contains long chains of molecules) melts during the preparatory phase, both the heat and the shearing force of the extruder temporarily break the molecular bonds. Under pressure, the molten plastic flows into the mould, and as the molecules enter the mould to fill every detail, they are forced to adapt and assume the intended shape of the final part Compared to linear channels or wide angles, very acute angles put the molecules under a higher strain. Even the abrupt transition from one feature to another is a cause of stress for the molecules.
As the material cools and solidifies, the molecular bonds return to their original state. At this point, the strains – ‘blocked’ inside the plastic -may cause deformation, sink marks, premature breaks, or other flaws.
Some molecular strains are certainly foreseeable but not avoidable. Therefore, the design should try to reduce them as much as possible. For instance, with a smooth and regular transition between the various features or the incorporation of rounded parts and fittings in potentially strained areas.
2) Suction marks
When the molten substance flows into the injection mould, thick sections cool down slower than the rest, as the deeper material is isolated from the faster-cooling outer surface. Therefore, when the inner part cools, it shrinks at a different speed than the already cooled outer coating. This difference in cooling rate causes an inward shrinking that results in a suction mark on the outer surface of the part or completely deforms it. t doesn’t represent just a visual imperfection but also an additional molecular strain. Suction marks may occur in other less visible areas such as angles, ribs or layered parts.
One way to avoid suction marks is to reduce the wall thickness by removing some of the inner material of the part. If necessary, counterbalance the loss of strength by building a network of ribs inside the hollow area.
3) Common injection moulding defects
Injection moulding is a complex process where production problems may occur. Mould defects or wrong procedures are usually responsible for a good portion of these problems.
Blister Raised or layered areas on the surface of the plastic part.
Cause: mould or materials too hot, insufficient cooling time, faulty heater
Burn marks Air Burn/Gas Burn Either black or rust coloured burnt areas on the edges or the surface of the final product.
Cause: ventilation system failure, injection rate too high
Delamination Thin layers of the material peel away from the surface of the part.
Cause: contamination of the material e.g. PP mixed with ABS. As materials do not bind as intended, delamination it’s not only a visual imperfection but an extremely dangerous flaw – especially if the final part finds application in a field where safety and good resistance are required.
Burrs.A thin layer of excess raw material flows out of the intended shapes.
Cause: Damaged mould, injection rate too high, an excessive amount of material, insufficient clamping force. Or it could be caused by the contamination of the material with dirt or a foreign debris in the barrel.
Flow lines. Discoloured wavy lines or patterns.
Cause: injection rate too low (the plastic has cooled cools too quickly during injection, injection speed should be set on the maximum appropriate values)
Sink marks. Localised depressions
Cause: holding time or pressure too low, insufficient cooling time, with sprueless hot runners this can also be caused by the injection point temperature being set too high
Short shot. Partially filled part
Cause: Lack of material, injection speed or pressure too low
Splay marks. Splash marks or silver streaks.
Cause: streaks along the flow pattern caused by excess moisture or trapped gas inside the material – usually where the polymers cooled unevenly.
Stringiness. Fillets.
Cause: String like remnant from previous injection in the new one. Nozzle temperature too high. Injection point cooling time too short
Vacuum voids (Air Pockets)
Cause: Lack of packing pressure (packing pressure is applied during cooling time). Faulty mould design e.g. the two halves are not well centred; the wall thickness is not uniform.
Weld lines. Knit lines/Meld lines Discoloured lines on the merging point
Cause: material or mould temperatures set too low (the material is too cold and doesn’t merge properly)
Warping (or warpage) Distorted part
Cause: material is too hot, cooling time too short, non-uniform cooling of the mould, inadequate water temperature (the components bends inwards towards the hot side of the mould)